Step by step
-
Add the shoot
Drag in a folder or photos; RAW is supported. If the folder has subfolders that contain photos, Pikaj asks before adding whether you want to add them too. You choose the file type (RAW, JPG, All) before adding. Each frame is analyzed on its own.
-
Choose the correction level
While the frames are being analyzed, three samples from the shoot appear. In the large view, compare before and after by dragging the divider or side by side (the O key shows the original); zoom in with the wheel to look at the details. At the bottom, choose Original, Light, Balanced or Strong: your choice is applied to all frames when you press Start (with Original, no frame is corrected). Camera profile, LUT and skin retouching are chosen on the same screen.
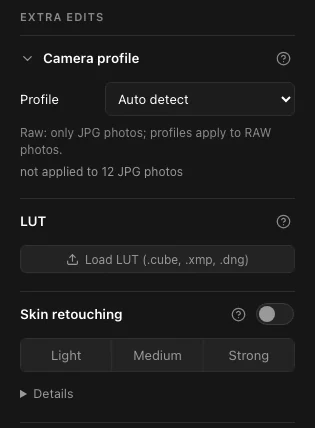
Camera profile, LUT and skin retouching on the same screen. -
See the problems
Exposure, white balance, tilted framing, noise and blur are flagged; filter by problem with the yellow ! button at the top. Library shows the frames in a grid; double-click to open Develop: the frame is enlarged in the middle, with the filmstrip below and the detailed settings on the right. The G and D keys switch views. Right-click to open a frame in Photoshop or Lightroom; when you save in Photoshop, the frame is updated.
-
Camera profile and LUT
The camera profile brings the color of RAW frames closer to your camera's JPG look; the default is “Auto detect”: if a profile has been learned for your camera on this computer, it is applied, otherwise Raw (neutral). With Load LUT, choose a .cube file, a Lightroom preset (.xmp) or a .dng; strength starts at 50%. Both are applied in the preview and in the export.
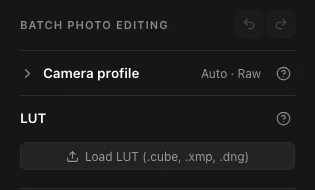
Camera profile and Load LUT. -
Correct automatically
When you press Start, the level you chose (Light, Balanced, Strong) is applied to all frames; exposure and white balance problems are corrected. Change the level, or turn it off, with Auto correct in the Library panel (when it is off, no frame is corrected). Checked frames are the corrected frames. Tilted framing that was measured with confidence is rotated and cropped. On a frame you don't like, turn off “Apply to this frame” in Develop.
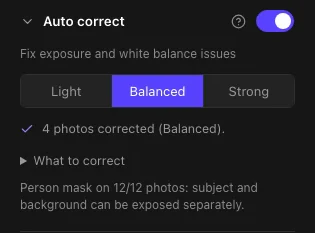
Auto correct: the level and how many photos were corrected. -
Skin retouching
Starts off. Turn on the switch in the header and choose Light, Medium or Strong; under Details you can adjust skin, pores, pimples and blemishes, under-eye, eye, teeth and sharpness processing separately. Pimples and blemishes are found and removed by themselves; dark moles are left alone, freckles may fade.
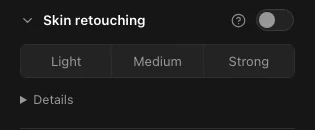
Skin retouching starts off. -
Develop: fine-tune frame by frame
In Develop (D) the frame is enlarged in the middle; the panel on the right is split into simple sections, like Lightroom: Basic (temperature can be typed in Kelvin, tint, exposure, contrast, highlights, shadows, whites, blacks), Color, Detail (clarity, sharpening, noise reduction), Skin, Subject/Background, Crop and LUT. Adjust one frame and make it the Reference; Match to reference brings the others closer to it.
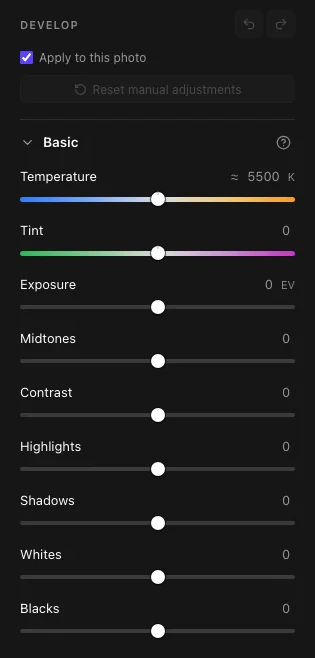
Develop: the Basic section. -
Export
Choose the folder, the quality and the scope. Frames are processed at their own resolution and written to new files; the originals do not change. Frames marked Rejected are left out by default (the files are not deleted). The window shows an estimated time based on the speed measured in your previous exports (RAW and JPG are measured separately; there is no estimate on your first export).
The images are taken from Pikaj's real interface; only the settings panels are shown.
Related guides
- Batch Photo Editing in PikajProduct page: what it finds and fixes.Product page
- How to make ID and passport photos automaticallyAdd a photo; the face is found, the photo is cropped for the document, background and lighting are corrected and the print sheet is prepared.6 steps
- How to design a photo albumSet up an album at the manufacturer's size; spreads are drawn at print size, and you are warned if the resolution is not enough.5 steps
- How to make a collage and a carouselMake single-page collages and carousels in social media sizes.4 steps
Download Pikaj
Pikaj is a desktop program; the versions are on the download page. Try it free for 15 days; no card details are required.